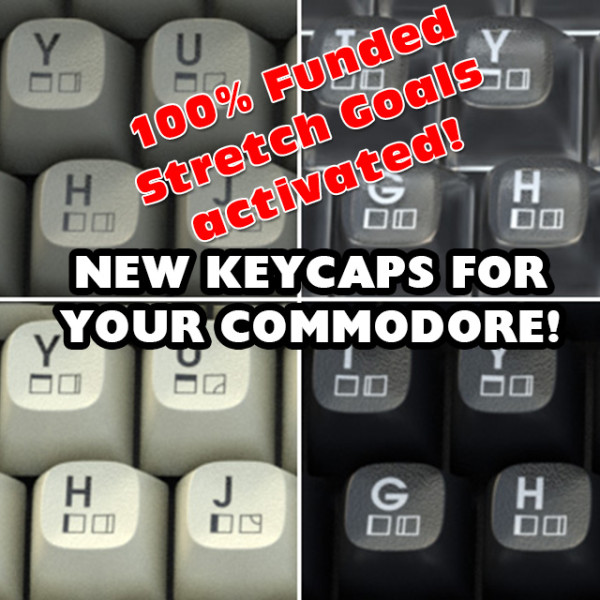
All new keycaps for your C64 and others!
100% FUNDED AS OF 12/30/2019 – WORKING ON THE STRETCH GOALS!
The Campaign…
In early March 2015, a crowd funded campaign was launched to repair the molds and produce the plastic cases used for the original Commodore 64C computer. This meant that cases in colors other than what Commodore originally provided could be available for the first time ever. The Commodore retro community rejoiced! I personally backed this project and received several different colored cases, including clear – which is something that I had always wanted.
One thing that has been missing are new keycaps to match these cases, or even to just personalize your existing Commodore computer. Old plastic yellows over time, and although chemical treatments (like “retrobrite”) work, it’s messy and not a permanent solution. The real solution is make all-new keycaps with modern plastic and printing. So, I am launching this campaign in hopes to do just that! I want to make brand new keycaps for your Commodore computer! These would fit the Commodore VIC-20, Commodore 64, Commodore 64C, and possibly other models that used the same keycap plunger design.
The Cost…
Creating tooling (molds) for plastic injection is expensive. Producing keycaps in the U.S. has an average cost of $178 per cap set, with a 1,000 set minimum run. Clearly that is not an attractive option. Cost does go down the higher the volume, but the reality is that this is a very small niche market. If the production quantities could be in the millions (like modern PC keyboards), then we could all enjoy dirt cheap keycaps. Unfortunately, that is not the case here. However, I was able to work out what I believe is pricing that won’t break the bank!
The Goal…
There is a minimum requirement of producing 1,000 sets to have reasonable pricing. The Fixed Funding (all-or-nothing) goal of $43,000 is the break-even point for this campaign. This amount will pay for the tooling cost along with 1,000 sets of keycaps, the Indiegogo fee, credit card processing fees, and will offset the typical 5% backer cancellations. This amount also includes the shipping cost the backer pays, which for some reason Indiegogo adds to the total amount you have raised for your campaign. If you select a perk for backing multiple keycap sets (two sets, three sets, etc.) the shipping is combined, and depending on the number of keycap sets you select the shipping cost may be slightly higher than backing just a single set. If you plan to back more than one keycap set, make sure you choose one of the multiple keycap perks. The bottom line is that at least 1,000 keycaps sets must be backed to reach the funding goal. Now that we have exceeded the funding goal there are some exciting bonus offerings that will be available!
What You Get…
There can be a change of color every 250 sets that are run. At 1,000 sets, that means we can have four different colors of keycaps. Right now, the color choices will be either black, white, gray, or clear. If I find there is not enough interest in one color to meet the 250 set requirement, a different color would be used.
The keyboard text will be the 2nd generation Commodore C64C type, printed only on the top of the keycaps. You will choose your keycap color(s) when the campaign ends (first-backed, first-choice of colors). The keycap text color can not be chosen, but it will be the proper contrasting color. You can of course back multiple sets and mix and match keycap colors!
The current campaign color options are shown below. Stretch goal colors will be added if we get that far. You will choose your color(s) when the campaign ends.
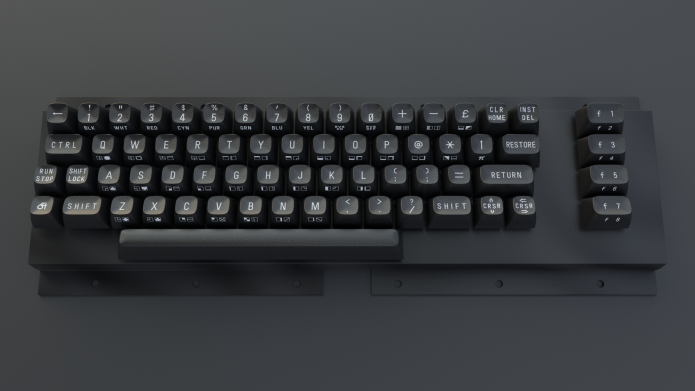 Black keycaps w/white text
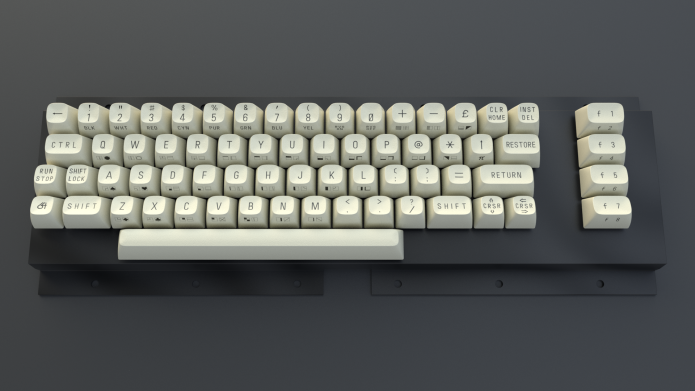 White keycaps w/black text
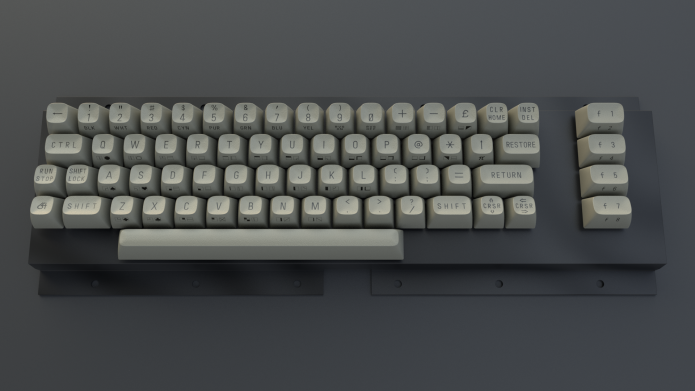 Gray keycaps w/black text
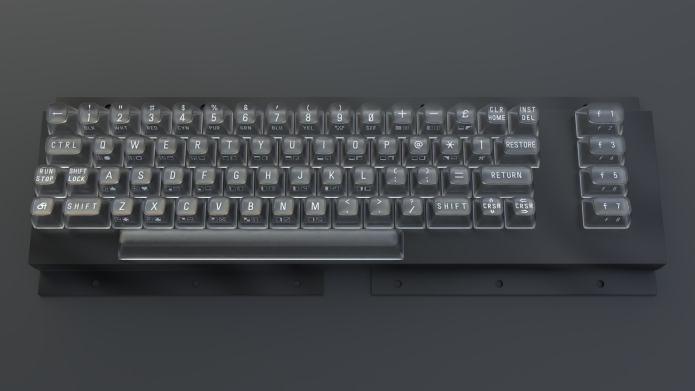 Clear keycaps w/white text
Timeline…
It takes approximately 45 working days to create the molds and make the first samples. If any changes are required to the mold, then there is re-work time required (typically a few days) along with making the new samples. I don’t expect any issues with the design of the keycaps themselves since I have already made 3D resin prototypes and have verified their size and fit on an actual keyboard.
The estimated time line is shown below. If there are changes required to the mold or text characters after the evaluation period it will push them timeline out a bit.
- Campaign Ends: January 17th, 2020
- Funds released/tooling ordered: January 22nd, 2020
- Tooling finished: March 25th, 2020 (includes 2 week delay due to Chinese New Year)
- First evaluation samples received: April 2nd, 2020
- Confirmation of number of units and colors: April 6th, 2020
- Full production begins: April 8th, 2020
- First batch received: April 22nd, 2020
- Sorting/evaluation: April 23th, 2020
- Packaging/shipping to backers begins: April 27th, 2020
- Starting to appear In backers hands: May 4th, 2020
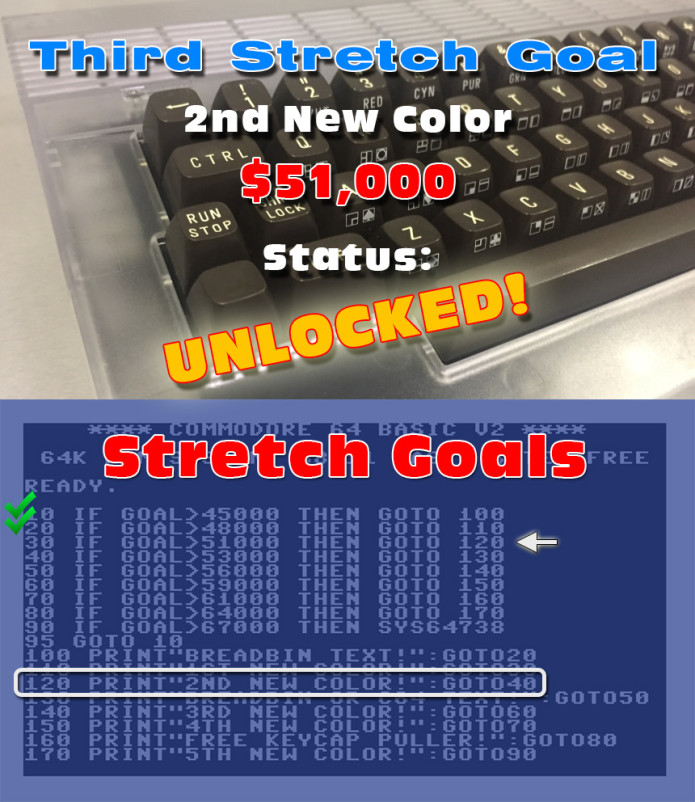
Stretch Goals…
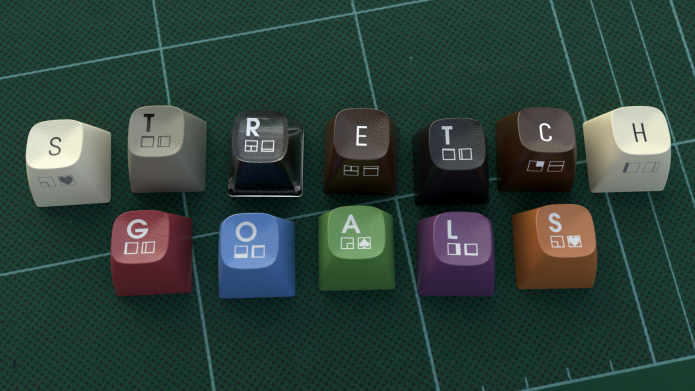
Stretch goals achieved so far:
Stretch goal 1: Having breadbin (top+face printed text) keycaps INSTEAD of C64C (top-only printed text) keycaps.
Stretch goal 2: New color, to be decided by the UltimateBacker!
Risks & Challenges
I believe I have what it takes to make this possible:
- I will be using a real company that does nothing but make keyboards and keycaps.
- I have already finished re-creating the keycaps and text.
- I have made functioning prototype keycaps to test fit.
- I have the capability to store, handle, and ship thousands of package to customers.
- I have a long time history in the Commodore community.
- I love Commodore!
I have insurance covering shipments and the facility that would be storing the keycaps (in case of fire), and every protection mechanism I can think of in place already. The actual company producing the product is really the only thing that I can’t control. However, I do have three different well established companies that I can use, and they have all agreed on the same price. So, I have backups in place should one company suddenly drop the ball.
Technical details…
I am not a keycap guru. I don’t pretend to be, and I previously had zero experience with making keycaps. What have I learned on this journey (and confirmed by the plastic injection companies I have worked with in the past) is that when making keycaps you need to just use a company who’s specialty is only making keycaps! That is what I have done for this campaign!
To prove that I have done my due diligence and give you some confidence that this campaign will provide keycaps to backers, I would like to share with you some history and what it takes to make accurate keycaps (besides having the right manufacturer).
The Commodore keycaps were designed by the folks at Commodore Business Machines (CBM). CBM made office equipment like typewriters, adding machines, calculators, etc. long before they ever made the most popular home computer ever sold. So, they had experience with making keycaps and buttons. Ergonomics are important when it comes to typing, so the keycaps used on the Commodore 64 are made up of 10 different shapes. You probably wouldn’t know it just by looking at the keyboard, but there is a deliberate “concaved slope” that makes up the keyboard shape.
There are four rows of standard width keycaps along with other keycaps of varying widths. Row 1 has 16 keycaps, Row 2 has 13 keycaps, Row 3 has 14 keycaps, and Row 4 has 13 keycaps. F1 and F5 are unique shapes. F3’s shape is shared with CONTROL and RESTORE. F7’s shape is shared with both SHIFT keycaps. RETURN and SPACE BAR are unique shapes.
Double-shot vs. single-shot
Commodore used two different techniques to make their keycaps. The VIC-20 and original Commodore 64 bread bin used a double-shot mold. To prevent keycap text from just wearing off over time, a double-shot process embosses a different colored plastic insert into an outer shell, fusing the plastic together permanently. This process eliminates having to print the text on the top of each keycap. Only the faces of the keycaps are the printed, if necessary. The double-shot process is more durable because no text is printed on the top, but it is also substantially more expensive as elaborate molds have to be created.
The single-shot process is just a single operation, just like a standard plastic enclosure. This uses standard molds, but requires printing on the top and face of each keycap.
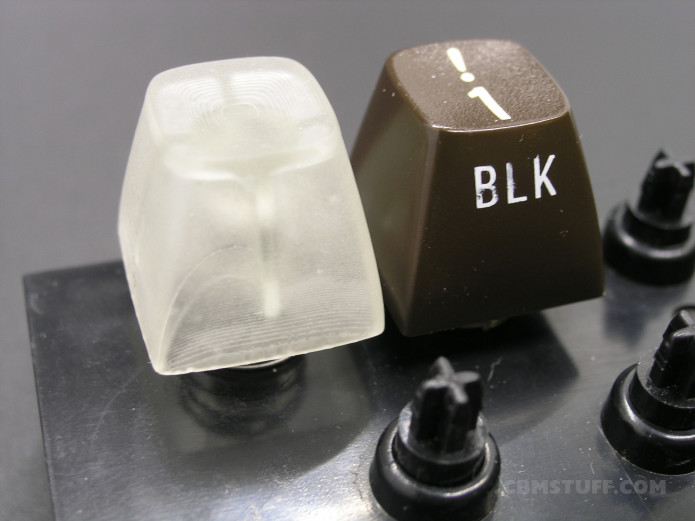
Below is a picture (of the bottom side) of double-shot and single-shot keycaps. You can easily see the difference between the two methods. I am using the single-shot process for this campaign.
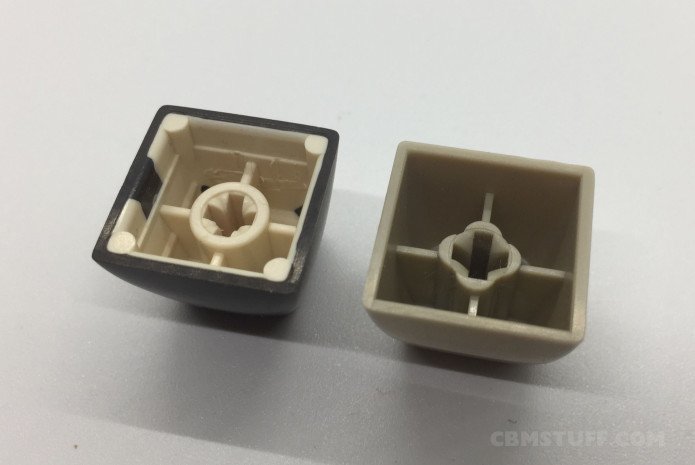 Keycaps: Commodore 64 Bread Bin (left) and Commodore 64C (right)
So, how do you create accurate keycaps?
This entire process is shown (quickly) in the campaign video. I used the best method that I could come up with – one that I have used in the past. I used a high precision 3D scanner and scanned each of the 10 different keycap shapes. I scanned each keycap shape 25 times, at 4 different orientations. After the scans were complete I used the stitching operation in the 3D scanner software to piece together the keycap to build a mesh. I used a variety of tools to clean up the mesh. I then used a CAD program to create a 3D model over top of the mesh (attached to it), and then removed the mesh completely. This allowed me to make sure that the keycap shape was perfectly symmetrical, eliminating any errors in the mesh. This process was done for all 10 keycap shapes. After I had finished this process I started having some conversations with some individuals who were offering their help with the project. Dan Tootill provided me with his Blender based keycaps that he created by hand (by making profiles from original keycaps). I was able to overlay my meshes and Dan’s data to compare and tweak my 3D models. Dan provided the renderings you see above and throughout the campaign video. I would like to thank Dan for his amazing support!
Once the keycap shapes were made I had to design the internal structure for the plunger receptacle. Knowing how plastic flexes and cracks I opted to use a receptacle more like the double-shot keycap, which makes it stronger and less likely to show through on the top side due to “sinking”.
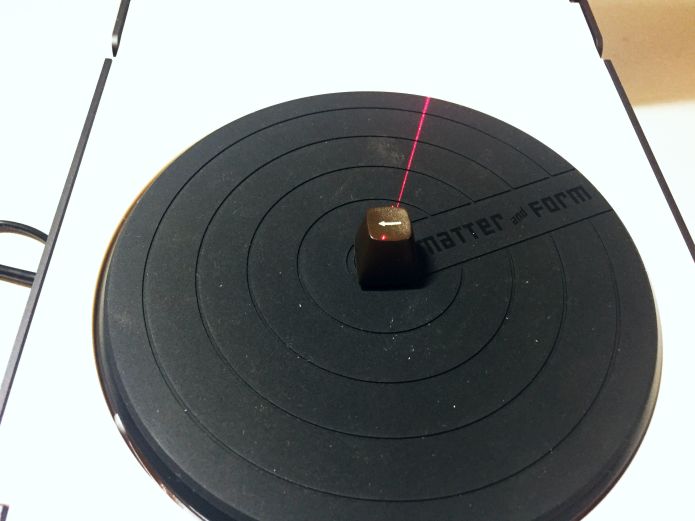 Scanning the keycap with a Matter and Form 3D scanner
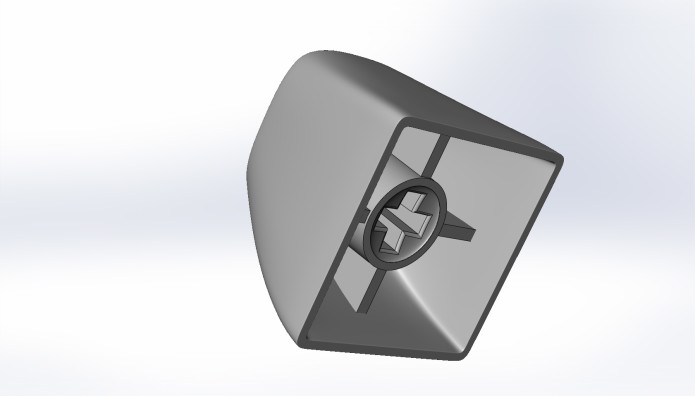 3D modeled result
3D printing some samples
I have been using FDM 3D printers for many years to create pre-production samples of enclosures. The quality of a FDM print is nowhere near the quality of an injection molded part, but it is typically good enough to test fit circuit boards, buttons, knobs, displays, etc. before you commit to having molds made. For something as small as a keycap, a FDM printer is not really an option. So, I looked into 3D resin printers. I purchased several types, but ended up using the Elegoo Mars resin printer for all of the prototyping for this project. Due to the Mars’ incredible 50um resolution, the keycap prototypes only required a light sanding of the support attachment points to make them perfectly smooth. When using translucent resin you can see the layer lines, but you can’t feel them. I don’t normally publicly recommend a product, but in this case the end result was so amazing that it was what motivated me to finish this campaign and get it launched! For more information on the Elegoo Mars 3D resin printer, click here: https://amzn.to/2Qi3Tk2
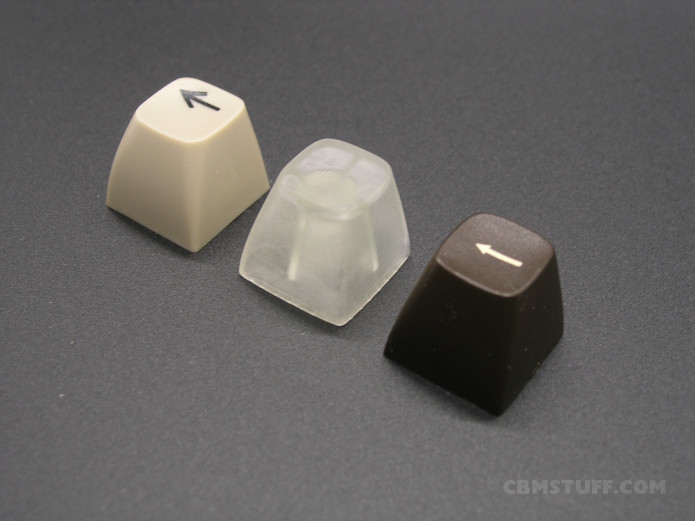 C64C, Prototype, and Bread bin Keycaps
 Test Fitting the Prototype
You need text too!
I reached out to some of the old Commodore employees that might have been around when the VIC-20 and Commodore 64 were put into production. I was trying to determine what font was actually used on the keycaps. There are a LOT of fonts that are close, but nothing I could find was 100% accurate. None of the old Commodore guys knew for sure what font was used. So, I used the same method I used on the keycaps…. take each keycap and scan the top (and face) of them. Then use a variety of programs to clean up the imagery and convert the text into vector format so that each character (or glyph) was the exact height and width. Dan had done this as well and he sent his to me and we compared notes on the text structure. 3D artist, Keith Greene, also provided some original bread bin style text that he had done for his rendering projects. I would like to thank Keith for his support as well! After this work was completed I had a series of vector graphics files, one for each keycap that has printed text.
 C64 Bread bin Top & Face Text
The end result
As you can imagine, it was a lot of work. I spent hundreds of hours on the scanning and clean up alone. The people who have contributed also have spent many, many, hours to generate their data. I wanted something that was not “sort of like” the original keycap shape. I wanted a drop-in replacement that would pass for the real thing. I have definitely achieved that goal.
What to do about the trademarked “Commodore” key?
Probably the most talked about part of this project is what should be done about the infamous Commodore key. That famous “chicken head” logo is something that is a registered trademark of C= Holdings B.V. See http://tsdr.uspto.gov/#caseNumber=1242650&caseSearchType=US_APPLICATION&caseType=US_REGISTRATION_NO&searchType=statusSearch for details on the trademark.
I had spent several months trying to reach C= Holdings B.V., which is now called Commodore Corp. A few days before this campaign was to be launched I finally received a response. We are currently discussing what a license would cost to use the Commodore logo. If an agreement can be made then that cost is will need to be amortized into the campaign cost – likely as a stretch goal.
If licensing of the Commodore logo is deemed to be too costly then a vote could be taken on what to put on that key, be it the ’64’ logo that Dan has created in the images above, the letters C-B-M, a check mark, a clown face, etc.. or just leaving it blank.
My Story…
I am a long time Commodore developer and enthusiast. I started with a Commodore PET 2001 in 1977. I have spent the majority of my life as a hardware engineer and software developer, and from 1983 until 2000 I was fortunate enough to have a full time job developing commercial products for the various Commodore machines (PET, VIC-20, C64, C128, and Amiga). When the Commodore market finally diminished, I was forced to move on and develop products for other industries. To date I have designed and produced hundreds of different commercial products ranging from simple electro-pneumatic control systems, to IoT and home automation products, to advanced flight/guidance control systems for ROVs and UAVs. I designed the electronics and plastic enclosures for all of these products, and in the process I have developed great relationships with many domestic and off-shore production companies, including injection molding companies.
It seems that you just can’t “quit” the love for Commodore computers, so in 2012 I got into the retro computing scene and created CBMSTUFF.COM. I have been producing modern products for retro computing enthusiasts as a side business to my day job.
I am the creator/sponsor of Commodore Retro Expo (CRX), which is an annual gathering of Commodore enthusiasts from all over the world. More information about this event can be found on the CRX website: www.crxevent.com.
Credits…
There have been a lot of people providing assistance with this project. The list is long, but special thanks goes out to:
- Dan Tootill for providing the AMAZING renderings, various 3D graphics, and keycap text!
- Keith Greene for providing vectorized keycap text.
- Eric Hill (www.amigalove.com) for his keycap research and nudging me to follow through with this project.
- My wife for loving the nerd in me. 🙂
Music:
Eric Skiff – Come and Find Me/B Mix – Resistor Anthems – Available at http://EricSkiff.com/music
Patrick de Arteaga – Chiptronical – Chiptune Music – Available at https://patrickdearteaga.com/chiptune-8-bit-retro/
Legal Disclaimer…
This campaign is in no way associated with any entity, past or present, that has the rights to the Commodore name or logos. Commodore and its various logos are trademarks of C= Holdings (Commodore Corp).
The contents of this campaign are copyright (C) 2019 By CBMSTUFF.COM. You are welcome to use any of the content for the purpose of promoting this campaign only.
Thank you for viewing this campaign! I hope that you will support it! Please tell your friends about it!
https://www.facebook.com/CBMSTUFF